![[AT-43 emblem]](img/at-43.png)
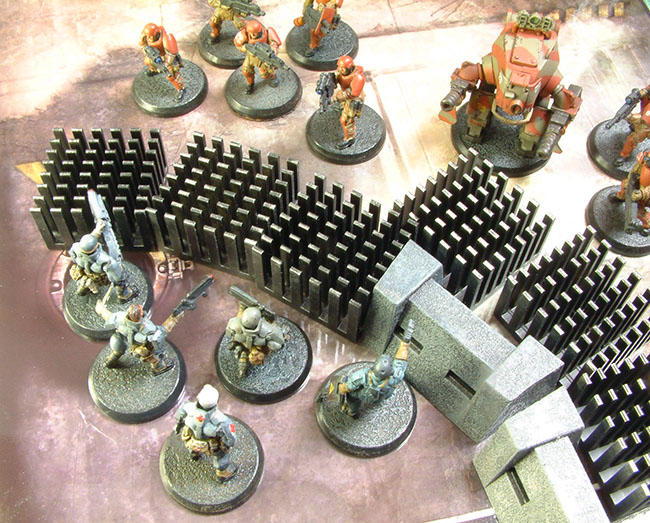
Several AT-43 models come with low and high walls that are mainly intended as anti-vehicle defenses, but there are no similar anti-infantry barriers in the game. This article provides rules for some that you can easily make yourself.
Infantry traps use the following game rules.
Both infantry and armored fighting vehicles can move over an infantry trap, but it halves movement for models moving over them, just as for infantry moving over low walls.
Additionally, any infantry model that moves over an infantry trap takes ![]() 5/1 damage for each individual trap it moves over in a turn; this damage is taken as soon as the model enters the obstacle. If a model ends its move on a trap, it will suffer this damage again for the same obstacle when it moves off or over it in a subsequent turn; the damage is taken when the model starts its movement. It also suffers the same damage on any turn it remains stationary on the obstacle; in this case, the damage is taken when the model's unit ends its activation.
5/1 damage for each individual trap it moves over in a turn; this damage is taken as soon as the model enters the obstacle. If a model ends its move on a trap, it will suffer this damage again for the same obstacle when it moves off or over it in a subsequent turn; the damage is taken when the model starts its movement. It also suffers the same damage on any turn it remains stationary on the obstacle; in this case, the damage is taken when the model's unit ends its activation.
| Structure points | Size | ||
|---|---|---|---|
| Infantry trap | 8 | 2 | 1 |
Infantry traps can be attacked if the scenario allows attacking of low walls and/or of infantry traps specifically; if this is the case, they may be destroyed in two ways. One is to use the Sabotage
ability (of combat engineers, for example) to destroy them in the normal manner.
The second way is to hit the trap with an area-effect weapon that does not have the Projection
ability. If a trap is in the area of effect of such a weapon, on purpose or by accident, it will take damage from it using the normal rules. Note that flamers are Projection
weapons and so cannot damage infantry traps.
Any model with the Hoist
ability (such as a Hekat Golgoth) can move an infantry trap as if it were a low wall.
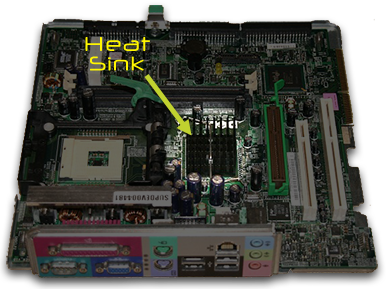
Infantry traps can be made in any number of ways. The ones shown on this page are Foxconn-made computer heat sinks for northbridge chips, taken from old Dell OptiPlex GX260 computers that were being broken up for scrap and spare parts. The photograph below shows a motherboard of such a computer with the heat sink highlighted.
The example below shows how to turn a heat sink into an infantry trap.
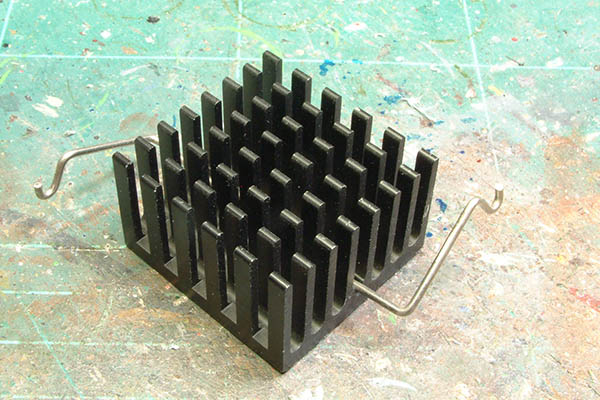
This is a heat sink as it was removed from a computer motherboard, like that shown above. The heat sink is made from black-painted aluminum, and has a length of steel spring wire running down the middle, as can be seen in the photograph. This wire normally hooks onto the motherboard to hold the heat sink in place, but gets in the way for gaming.
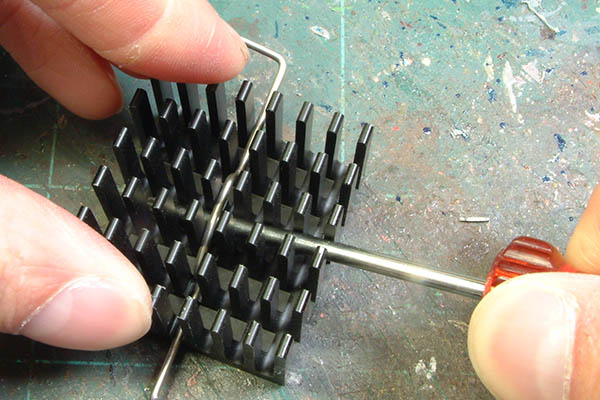
To remove the steel wire, take a screwdriver with a narrow shaft that fits between the prongs of the heat sink, and stick it under the wire in the middle of the heat sink. Firmly hold down the heat sink and lift up the screwdriver's handle, using the screwdriver as a lever to pop the steel wire out of the clips that hold it in place.
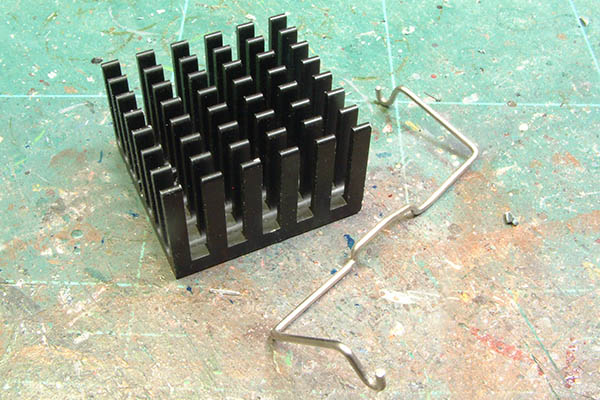
The result, then, is as shown here: the wire separate from the heat sink. You can now use it directly in your games, or do a small amount of painting to make it look better.
This photo shows what needs to be done: the Foxconn logo and part number must be painted out, and the white thermal paste on the bottom is best removed.
You can remove the paste with a knife: just slip the blade of a hobby knife underneath the paste and it tends to come right off in large flakes. You can see in this photo where it used to be, and also that removing the manufacturer's data is very easy as well. I'm using flat black acrylic paint by Tamiya here, which is almost invisible on the heat sink once it has dried. Other brands of flat black paint will probably have much the same effect.
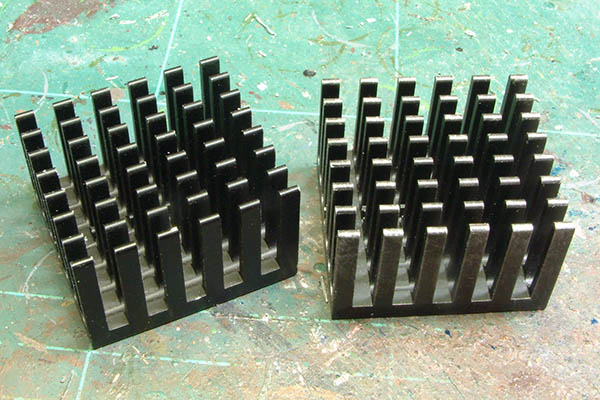
This final photo shows an unpainted heat sink on the left, and one that has been drybrushed with two shades of metallic paint on the right. This makes it appear a little more worn, but is not 100% necessary. You can, of course, go much further and add rust or other weathering to the infantry traps.
Unfortunately, these heat sinks seem to be difficult to purchase separately (unless you're a computer manufacturer, supposedly) so this may not be an option for everyone. However, it is easy enough to make something of similar size that looks spiky or otherwise difficult to cross for infantry: sticking toothpicks into a block of foam would do the trick, or gluing lengths of barbed wire (cut from fly screen mesh, for instance) to a base in random tangles will also produce good obstacles.