![[AT-43 emblem]](img/at-43.png)
Cities have public works of art on display, but they are rarely seen on wargames tables. This article shows one way to make such an artwork as a terrain piece, from plexiglass parts intended for a completely different purpose.
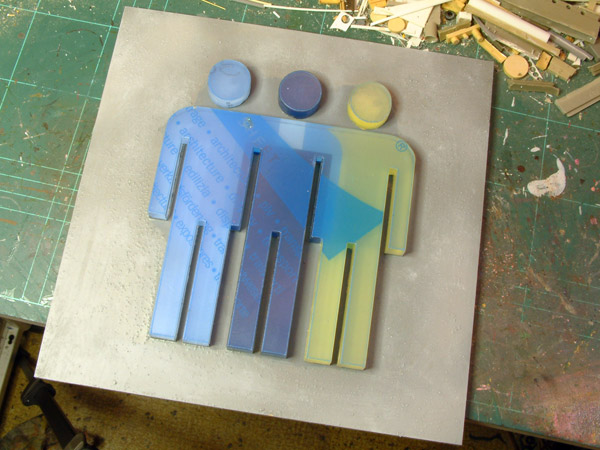
You can make a sculpture-like terrain piece from just about anything that does not seem to have any other real function. Used here were three sets of identical company emblems, representing a row of three stylized human figures, with separate heads, but all sorts of other things can be used. Souvenirs, awards, weird toys, parts of household devices, and so on could all be used to create sculptures.
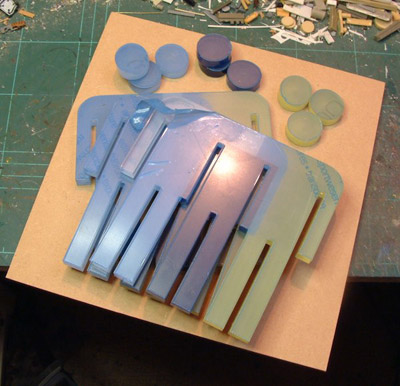
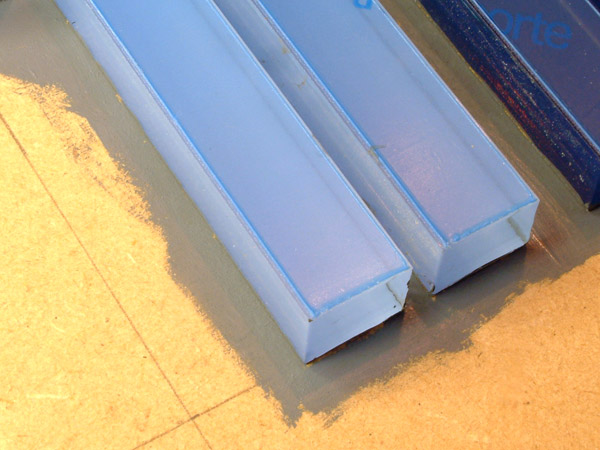
The photo above shows what was used for the sculpture shown in this article. The parts are pre-cut from clear plexiglass about 8 mm thick and painted on one side, with an adhesive backing on the painted side — the idea being that they can be stuck to doors, walls, etc. in the company's offices. The clear side has blue plastic foil on it to protect the surface from scratches, which can be seen in the photograph, peeled away a little in the upper left corner. (How does one come by such items? In this case, somebody left an envelope with these plexiglass bits and a bunch of stickers with the same emblem in the author's department of a company that used to pay him to mostly sit around in a dusty building and read Wikipedia and RoughlyDrafted much of the time. Almost a year later they were still there, untouched and clearly forgotten, so they were taken home and made into wargames terrain …)
Because the heads are separate, a base was needed, and to make it fit in with the tiles of the CNC Workshop Battle Grounds series, a piece of 6-mm thick MDF was cut to 23.4 cm × 23.4 cm. Incidentally, the easiest way to get the size right is to have the store saw the MDF to your specifications: just buy a full-size board and ask for it to be cut to whatever size you need.
The only other materials needed was some paint; most of this is described in the article about painting the Battle Grounds terrain.
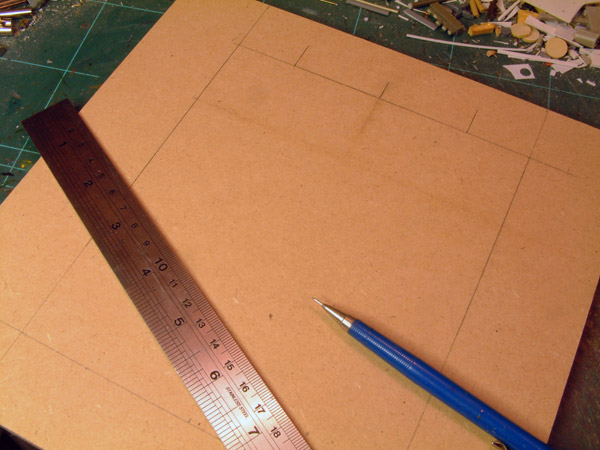
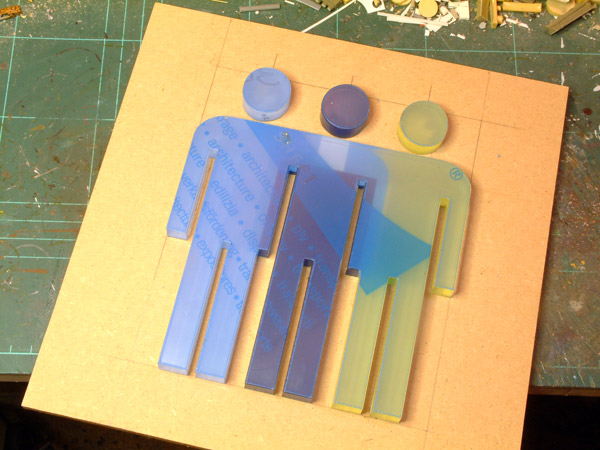
The first step was to mark out the position of the emblem on the base. You could just put it on any old how, but because most lines are parallel to the edges in the Battle Grounds set, the sculpture would look better if it is, too. All that is needed is a ruler and a pencil: measure up your sculpture, work out how much space to leave on either side, and mark out where it is to go. Because the three heads of the emblem were separate, their locations also needed to be marked, as witnessed by the three short lines in the top of the photo.

The next step was to remove the backing paper from one of the emblems, revealing the adhesive and the painted side.
The first emblem was then stuck to the base, taking care to line it up with the pencil lines. The other emblems were not yet added, because doing so would make painting the base more difficult, and because battle damage was going to be applied to them.
With the emblem stuck on, the areas immediately around the plexiglass were painted medium gray using a No. 1 brush. This was done because it would be hard to paint right up to the material with the big brush that was going to be used to paint most of the base — never mind in the narrow gaps between the figures. The color gray used was from the Games Workshop range, chosen because it came close to the base color used on the rest of the Battle Grounds tiles.
Once the paint was dry, the rest of the tile was painted in the same way as the rest of the Battle Grounds tiles, using gray primer mixed with sand, adding some gray blotches from a spraying can, followed by drybrushing the whole with light gray and white. The tile was then set aside for work on the rest of the sculpture.
Note that the protective plastic is still on the plexiglass, as this will help keep off paint that may get on it by accident.
The other two emblems were stuck together by removing the the backing paper from one and the protective plastic from both, then carefully putting the two emblems together.
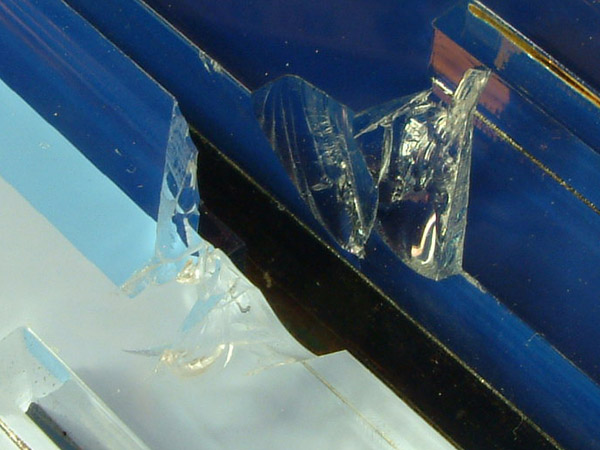
The damage shown here was created using a woodworking chisel and a hammer. By placing the chisel against an edge of the plexiglass and hitting the chisel with the hammer, random pieces soon come off, creating damage that looks like it could be from an explosion. Work with care and in small steps, because it is better to take off too little than too much. This is where you need to be careful! Plexiglass is a fairly tough and hard but brittle material, meaning chunks can fly away in unpredictable ways. You would do well to put on eye protection (normal glasses will do if you wear them, else safety glasses) before attempting to damage the sculture. Also, chisels are sharp instruments so be careful not to stab or cut anyone with one!

What battle-damaged sculpture would be complete without bullet holes? These were made by drilling holes using a 1.5-mm or so drill bit in a rotary tool. You could do it by hand with a pin vise, but experience showed that this is probably not something you want to do for more than two or three bullet holes. The advantage of drilling by hand is that it allows better control, while with a rotary tool you need to be careful not to break the drill bit, but a little practise should make perfect.
After drilling, the tip of an old hobby knife was inserted into the holes and twisted around to create ragged edges. There is no point in using a new blade, because the chances of breaking off the tip and wasting a perfectly good blade are fairly high.

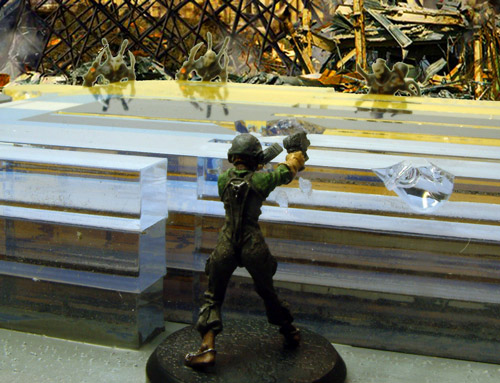
All that remained was to remove the backing paper and plastic and carefully put the battle-damaged piece on top of the piece that was already on the base. The end result is shown here.