![[AT-43 emblem]](img/at-43.png)
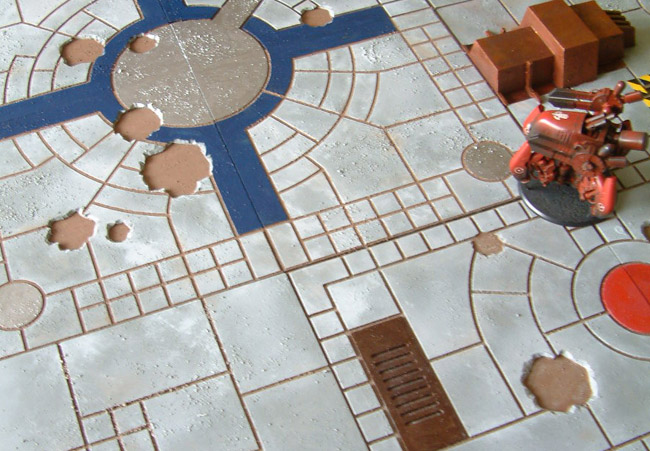
Australian company CNC Workshop produces some very good-looking urban terrain tiles in their Battle Grounds series, which makes good Damocles terrain for AT-43. The tiles shown above were painted as described in this article. Naturally, this is not the only way to paint them—use the techniques described below, and especially the colors, as inspiration for your own ways and designs, rather than as rules set in stone. And obviously, these techniques work just as well for other types of terrain, not just Battle Grounds.
The table shows the basics of paints used and painting order followed, while the next section describes the painting in more detail. The specific paints mentioned on the table are explained more fully there as well.
| Step 1 | Step 2 | Step 3 | Step 4 | |
|---|---|---|---|---|
| Paved surfaces | Paint with Histor Supergrondverf mixed with coarse sand | Spray Motip gray primer in random patches | Drybrush with Rackham Sharp Gray | Drybrush with Rackham Eternal White |
| Roads | Paint with Histor Supergrondverf mixed with black pigment | Spray black down center of road | Drybrush with Games Workshop Adeptus Battlegrey | |
| Manhole covers | Paint with Tamiya X-10 Gun Metal | Drybrush with Games Workshop Chainmail | ||
| Crater edges (roads only) | Paint with Games Workshop Adeptus Battlegrey | Drybrush with Games Workshop Fortress Grey | ||
| Drains | Paint with Games Workshop Tin Bitz | Drybrush with Games Workshop Chainmail | Paint slots black | |
| Dirt in panel lines & craters | Paint with Tamiya XF-52 Flat Earth | Drybrush with Games Workshop Bleached Bone | ||
| Generators | Paint with Games Workshop Bestial Brown | Paint with Tamiya X-34 Metallic Brown | Apply wash of Games Workshop Scorched Brown | Drybrush with Games Workshop Shining Gold |
| Hatch | Paint black | Paint with Tamiya X-10 Gun Metal (except recesses) | Drybrush with Games Workshop Boltgun Metal | Drybrush with Games Workshop Chainmail |
| Warning stripes | Paint with yellow (several coats) | Draw outlines of black areas with pencil and ruler | Paint with black | Drybrush with Games Workshop Fortress Grey |
| Landing pad metal parts | Paint with Games Workshop Chainmail | Stipple centers with Games Workshop Boltgun Metal | Stipple more lightly with Tamiya X-10 Gun Metal | |
| Landing pad lines | Paint with Tamiya XF-8 Flat Blue | Stipple centers with Games Workshop Ultramarines Blue | Drybrush with Rackham Wizard Blue | |
| Semicircles | Paint with Games Workshop Mechrite Red | Stipple centers with Games Workshop Blood Red |
The following are short explanations of the techniques mentioned on the table and in the next section. Note that all these will require some practise if you have never used them; scraps and offcuts from the Battle Grounds terrain make a good subject for this.
Drybrushing consists of putting paint on a brush and then wiping most of it off on a cloth or tissue. By then applying the brush to the thing you want to paint, the paint will only stick to relief and edges, so you can accentuate detail. Another use is to make things look dirty or worn by drybrushing with a color that replicates dirt or the color of paint that would be underneath the outer layer of paint on the real thing.
It is easy to put too much paint on the brush, so better err on the side of caution when practising this technique. It is always possible to drybrush some more if the result is too subtle, but it is very hard to remove paint if you applied too much.
Stippling is the technique of painting in dots and short brushstrokes so that these blend together without creating hard edges. To do this, apply paint to a brush and repeatedly stab
it at the surface, moving the brush a little with each stab. The object is to cover the area being painted reasonably well, but not so that the underlying paint becomes obscured completely; especially around the edges, the two should appear to run together.
A wash is nothing more than paint that has been thinned so far that it runs into grooves and around detail, but doesn't cover very well otherwise. If you use acrylic paints, you can thin them by adding plain water until the paint has a consistency you like. Perhaps superfluous to mention, but do not thin paint straight in the pot, bottle or tin. Instead, use a brush to put some paint in a palette (an empty jar lid will do just as well) and then add about the same amount of water and mix the two thoroughly. If the wash covers too well, you can use a brush to add more water straight onto the thing you are painting, while if the wash turns out to be too thin, let it dry and then apply another one.
Note that some manufacturers of game and model paints sell what they call washes
but which are, in fact, transparent paints. The two are quite different: a true wash is much thinner and flows like water rather than like paint. The effects you can get with the two, although similar, are somewhat different as well.
This section gives more detailed descriptions of how everything was painted.
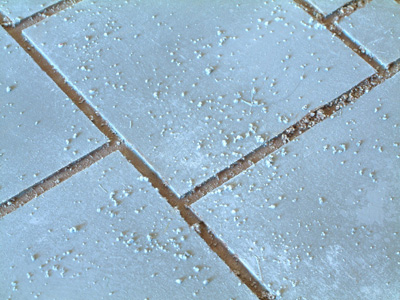
These are all the surfaces that are not streets, including the sidewalks. The base coat for these consists of gray Supergrondverf (Super Primer
) from Dutch paint manufacturer Histor, applied by brush. It has a neutral, medium gray color, and so is a good base for a concrete-like surface. Into this was mixed a fair amount of coarse sand to give the paint some texture. Be sure to stir this mixture very well, and to stir regularly while painting, because the sand will sink to the bottom of the can of paint very easily. (You may also want to mark the paint can's lid to indicate it contains sand, if you pour it straight into the can — this will avoid possibly unpleasant surprises at a later date.)
Once this was dry, it was touched up where necessary, because the primer had not covered perfectly with the first coat. After that second coat had also dried, patches of a lighter shade of gray were randomly applied over it, using Motip-brand gray primer from a spraying can. By keeping these patches random, the monotony of the base coat is broken up and the terrain starts to look more interesting.
When the spray paint was also dry, everything was drybrushed with Rackham Sharp Gray using a wide, flat brush, followed by a second drybrushing with Rackham Eternal White. These paints now seem to be discontinued, but any gray lighter than the two primers, and any white, will do. The point of these is to highlight the edges and the texture created by the sand, as well as to introduce more random spots of lighter colors on the pavement slabs.
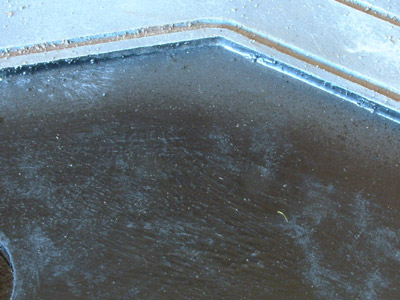
The sidewalks of the street tiles were painted just like the paved surfaces were, while the roads were treated slightly differently. The base color was also Histor Supergrondverf, but now with black pigment mixed in to darken it, but no sand, so that the road would be smoother than the pavement. Histor Super Colorant pigment was used for this, of which a whole 20-ml tube was squirted into a brand-new, 250-ml can of primer and then stirred until it had a uniform color. This darkened the paint's color drastically, making the roads stand out from the rest of the tiles. (Again, it is a good idea to paint the lid of the can with the new shade that is in it.)
With the paint dry, black was sprayed down the center of the road, using another Motip spraying can. More than half the total width was covered this way, creating black roads with dark gray edges in order to represent the dirt and rubber left behind by countless vehicles having driven over the asphalt. With the black paint dry, the roads were then drybrushed using Games Workshop Adeptus Battlegrey, from their Foundation Paints range; this is about the same color as the darkened primer used for the first coat of paint on the streets. Be sure to drybrush in the direction taken by traffic on the road, so that any stripes will run in that direction as well rather than sideways, which would look unrealistic.
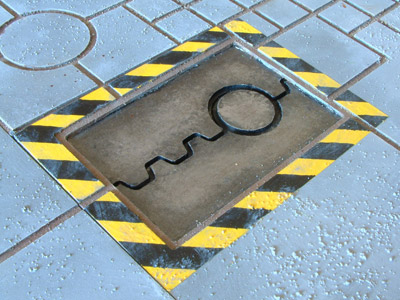
Most roads in the Battle Grounds set have a manhole cover in them, which was painted Tamiya X-10 Gun Metal (a dark metallic color) followed by a drybrushing with Games Workshop Chainmail (a light metallic color) after the markings had been applied.

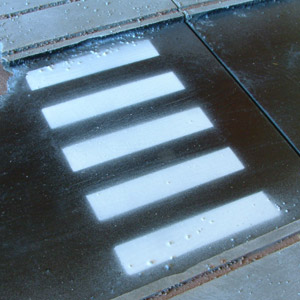
The markings, such as arrows and pedestrian crossings, were sprayed onto the roads with Motip white primer using templates made for the purpose; these will be available for download on this site in the near future. The markings were applied only after the manhole covers were painted, so they went over those as well.
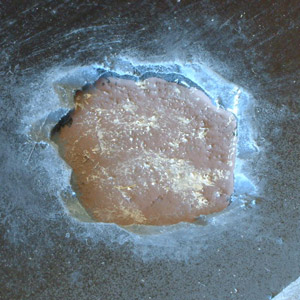
The craters on the roads needed a little more painting. Before painting, the edges of the craters had been cut to a more jagged appearance, and these were now painted with Games Workshop Adeptus Battlegrey. This more or less matches the darkened primer used on the road, thereby creating the effect that the explosion that made the crater has also removed the top layer of the road. This was then drybrushed with Games Workshop Fortress Grey.
The craters were painted only after the markings were applied to the road, so that these also appeared damaged by the explosions.
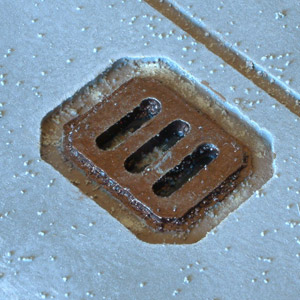
The various drains and grids set in the tiles were basecoated along with the rest of the tiles, and then overpainted with Games Workshop Tin Bitz, a dark red-brown metallic paint. They were then drybrushed with Games Workshop Chainmail to add highlights. The slots in the drains were then painted flat black to give the illusion of depth.
All the lines between the panels on the tiles, as well as the craters and dirt inside the drains, were laboriously painted with Tamiya XF-52 Flat Earth (a medium-brown dirt color) and Games Workshop Graveyard Earth (because the Flat Earth had run out; Graveyard Earth is actually slightly lighter, but not noticably so) using a No. 4 round brush. Once this was dry, it was all drybrushed with Games Workshop Bleached Bone, which is actually more of a pale sand color. Again, this highlighted the texture of the sand in the panel lines, since quite a lot of that ends up there when painting the base coat, and also served to reduce the color difference between the Tamiya and Games Workshop earth-colored paints.
Or whatever those two structures includes with the City Grounds set are supposed to be … These were first painted Games Workshop Bestial Brown, which is a very orange-brown color. Once this had dried, a fairly thick coat of Tamiya X-34 Metallic Brown was applied over them; since this covers very poorly, the Bestial Brown was needed as an undercoat. After this, a wash of Games Workshop Scorched Brown (a dark, chocolate-colored brown) was liberally applied over the whole structure to add some shadows, and finally, they were drybrushed with Games Workshop Shining Gold to create more visible highlights.
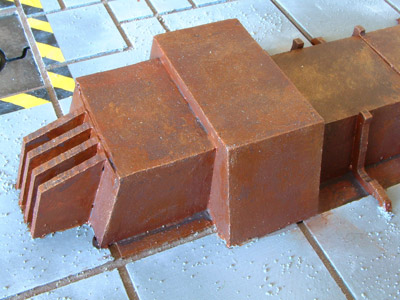
Once all this was dry, the interior of the generator with the vent was sprayed black, to hide the color of the bare MDF that was visible inside it otherwise.
The hatch in one of the generator tiles was first painted black, and then liberally painted with Tamiya X-10 Gun Metal, leaving the black only in the recesses and along the edges of the hatch. It was then drybrushed with Games Workshop Boltgun Metal, which is a medium shade of metallic color, and then Games Workshop Chainmail to create some more highlights.
The black and yellow warning stripes around the hatch were painted by taping off the area around the hatch, to the same width as the pavement on the narrow sides, and then painting this whole area yellow. This required about four or five coats, because yellow paint covers very poorly — regardless of which type of paint used, or which manufacturer made it. Once the yellow was satisfactory, the diagonal lines were marked out by measuring up the area and deciding on a good size that would make a whole number of lines fit in the area. After that, I used a ruler to draw markings and pencil lines to show where the lines were to go, and then hand-painted the black with a brush.
Once all the paint had dried, some drybrushing with Games Workshop Fortress Grey both made the paint look worn, and brought out the texture in the pavement again.
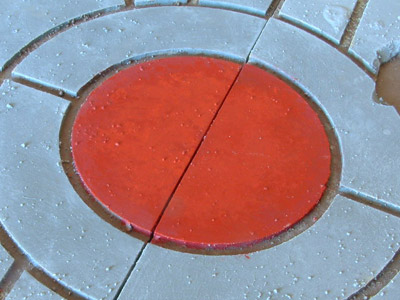
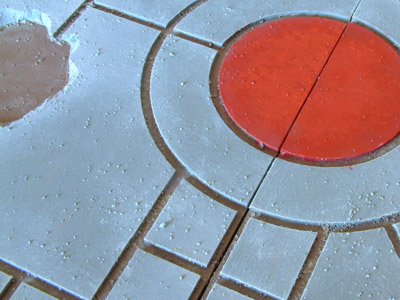
This refers to the four tiles that each have a quarter-circle in one corner, and which can be assembled to form a kind of landing pad.
The center, as well as the smaller circles around it and the projecting
bit with the circular design at the end, were all painted with Games Workshop Chainmail and then stippled with first Games Workshop Boltgun Metal and then Tamiya X-10 Gun Metal so that the centers of the various sections ended up darker than the edges.
The lines
around the central part of the landing pad were painted Tamiya XF-8 Flat Blue and then stippled in a similar manner with Games Workshop Ultramarine Blue, creating a lighter center to each area with a dark border. They were then drybrushed with Rackham Wizard Blue to bring out the very edges and the sand texture.
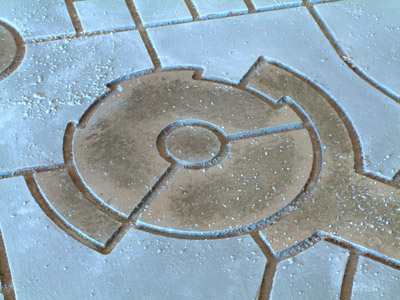

Two tiles have a semicircular area along one edge, so they can line up to form a full circle. This was similarly painted in a dark red, Games Workshop Mechrite Red, and then stippled with Games Workshop Blood Red to create a lighter center to the circle.