![[AT-43 emblem]](img/at-43.png)
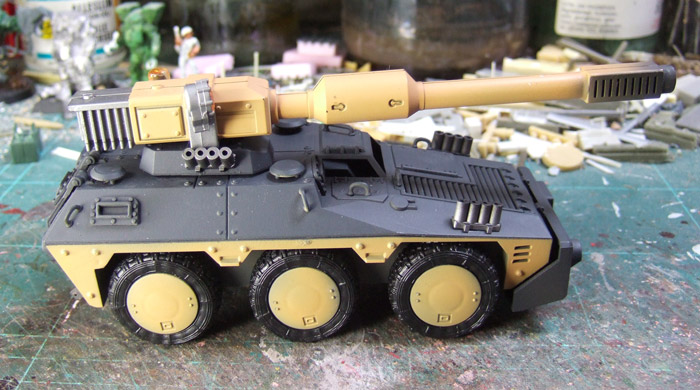
As any owner of the ONI Army Box probably knows, the gun on the Heavy Battletank is unbalanced and droops forward. This would not be too much of a problem, as it barely moves up and down anyway, but in drooping forward it pulls off the tiny turret on which it is mounted. There are various ways to fix this; the one proposed here is to add weight to the rear of the gun so it stays level.
Other than a model of the Heavy Battletank, at the time of writing only available by buying an ONI Army Box, you will need some lead sheet, a heavy-duty craft knife, pliers and superglue.
The choice for lead, by the way, is because it is the densest material you are likely to be able to use. Among the reasonably other common materials that may be suitable are such things as silver, gold and tungsten, but most people are unlikely to have enough of either to spare to put into a gaming model. Any lighter material, such as leftover pewter from metal wargames figures, metals such as iron or steel, or other materials like rocks and two-part epoxy putty, are not suitable — they all seem fairly heavy, but are not anywhere near heavy enough to balance the gun with the small amount that can be packed into it.
First of all, you need to lift the gun from the model. This is easy to do by gripping the barrel in one hand and the turret in the other, and twisting the barrel sideways and up so it comes free from the U-shaped part that holds it. Be careful, though, because you could easily break that part if you're not.
Next, split the barrel in its two pieces. You can see the join along the top and bottom, and it is likely to come apart if you wedge a fingernail in that; if not, carefully insert your craft knife into the join at a place where it does not seem to have been glued. Once you have separated the two parts a little, you can pull them apart all the way, but again, be careful not to break anything.
Toward the rear of the left half of the gun is a locating pin, and a matching socket is at the rear of the right half. On the left half may also be two raised, circular areas, one on either side of the locating pin; these are ejector marks caused by pins (the so-called ejectors
) that removed the part from the mold when it was made at the factory. The pin, socket and ejector marks must be removed for the weight to fit — if you don't, there is no room for enough lead to balance the gun, and you will have to resort to melting down your gold jewelry instead.
Though the bits to be removed are in an awkward location, it is doable with a heavy craft knife; do not use a standard hobby knife because the plastic is rather hard. Firmly rest the top or bottom (not the side!) of the gun half on your work surface and cut away the items that must be removed by pressing the knife down onto them with a fair amount of force. Always cut away from yourself and make sure your fingers are not in a position where the knife may cut them if it slips out of the part! You can minimize the risk if, as already mentoined, you cut downward toward your work surface. Cover this with a cutting mat or some other thick, strong but pliable material to protect both the work surface and yourself. Also remember that blunt knives are more likely to slip, so make sure you use a sharp one.
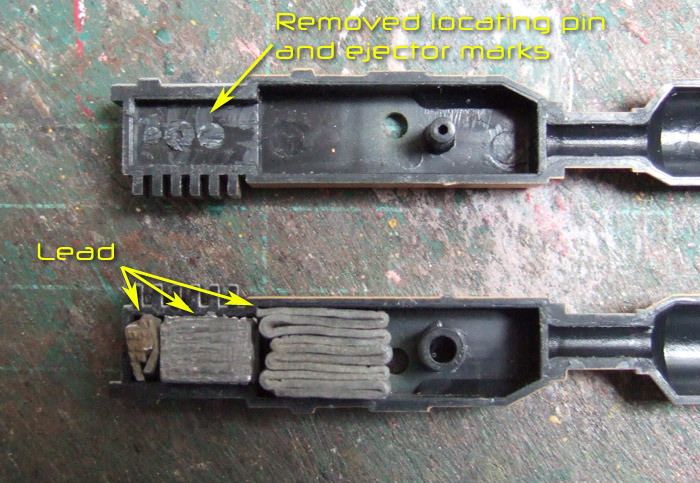
Now, the lead; I used sheet of 1 mm thick, which is easy to cut and fold. Cut the sheet lead into a strip 1 cm wide, and cut off about 18–20 grams of that (with 1-mm sheet lead that is 1 cm wide, you can cut off a piece 18 cm long to get that). Fold it up so it fits into the space in the gun, as shown in the photograph above. I had to cut it into three pieces: the largest one at the front, then a smaller piece behind it in the narrow part of the gun, and an even smaller bit in the very rear of the gun. It may take a bit of work to get it all to fit, and that is where the pliers come in: use them to squeeze the lead to compact it and make it fit. Test-fit it all the time to make sure it will actually fit inside the gun when the two parts are joined.
All the lead should be behind the hole in the side of the gun, else it will not help to balance things at all. You can test if the gun is balanced by putting the two pieces together without glue and sticking some kind of pin through the holes. If the gun stays level, you have put in enough; if it tips forward you need more (or move the lead you have toward the rear); while if it tips backward, you have put in too much lead. Once you are satisfied, put the whole gun back onto the model to make sure it also works well there.
When the gun is balanced to your satisfaction, take the gun apart again and let superglue run between the lead and the plastic to fix it — you do not want it able to move forward, as that will affect the gun's balance and it will be very hard to get it back to its original position once the gun is closed up.
Finally, apply superglue to the locating pins, the exposed sides of the lead, and along (part of) the gun's length. Don't use too much: just wet the pieces with the glue. After putting the two parts of the gun back together and waiting for the glue to set, you can click it back in place on the model, with the result shown at the top of this page.